As I sit here writing this, I can't believe the weather we are having for mid-November...it feels like the beginning of September, actually!
This month's block is called Chevrons, and here's what it looks like...
The block is 12.5" unfinished...like the others we've done so far.
We will be constructing this block using foundation paper-piecing.
I have to admit...I've never enjoyed FPP, but I do know that's the only way to get spectacular results with blocks like Mariner's Compass, etc.
The units in this block are fairly simple, and I would say to go ahead and use whatever method of FPP suits you. Last year I learned a "new-to-me" method which made it so much easier for my brain.
First thing....
For the fabrics that you need, the ones listed are fairly generous, which is fine. If you are a bit more experienced, you can cut the fabric pieces at 2.5"x6" instead of the listed 3"x6" to result in less waste.
For the background fabrics, I was able to get by by cutting 3 strips, 2.5"x20" for the chevron units instead of the 12 3"x6".
The postcard/cardboard...not necessary, unless using some is your preferred method.
You will need to print off 3 copies of page 2 of the instructions...
Please make sure that you have printed them at the correct size. As you see in the above picture, the unit should measure 3.5x4.5. Our instructions say to cut these units out on the outside lines...BUT, I prefer to cut around the units leaving a rough quarter to half inch all around each unit...
Paper-piece these units, using your preferred method. I have made one change, though, to make things a bit easier for block construction.
For your B units, change the order of the #'s....Instead of 1 at the top, and 3 at the bottom, pencil in the #3 at the top, and #1 at the bottom...
By reversing the order on the Unit B's, when we sew the 2 units together later the seams will nest together nicely resulting in less bulk.
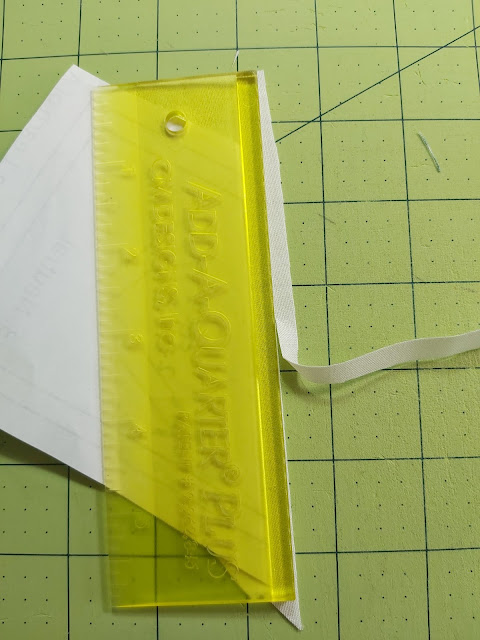
A tool that I have found handy for paper-piecing is the Add-a-Quarter ruler...
There is a little 1/4" ledge that sits on the edge of paper that helps cut a nice 1/4" seam allowance. Of course, you can do this with any of your rulers, but sometimes they will slip when you're holding them on paper, as opposed to the usual fabric that you usually use them on. This one stays nicely in place.
Sew all of your A and B units...
(you can see in the above picture that on the left side of the block the seams are pressed upward, and on the right side of the block they are pressed downward to make construction easier, as advised earlier)
You can find the PDF for the Chevron pattern...HERE.
Also, there is a bonus this month!
For the month of November, Quilt Junction in Waterford is offering 10% off the purchase of your very own Add-A-Quarter ruler! Just go visit Lana at Quilt Junction and take your first 2 blocks along to show her that you are taking part in the Modern BOM.


No comments:
Post a Comment